Map Search
The Map tab on the Search Page provides access to powerful mapping capabilities, which can be explored in greater depth by clicking the appropriate tab below:
- Search by Area: Pan and zoom to an area of interest, then initiate a search for OSDP records that are relevant to the visible map area.
- Build a Map: Add map layers or map context to the map and export the finished visual.
- Export your work: Capture the current map visual or prepare a summary of all OSDP records whose content was loaded into the map, available as a sharable link or for export to a spreadsheet.
- Get Viewer Help: Obtain viewer-specific help from within the map viewer.
The OSDP Search and Map capabilities work together to provide the information each requires, providing a bridge between the content that’s found and content that’s displayed. The topics below demonstrate this in greater detail.
Search by Area
Using your keyboard or mouse in the map area, follow the instructions in the Search by area of Interest block to pan and zoom the map to the area you’d like to search, then click on the Search this Area button.
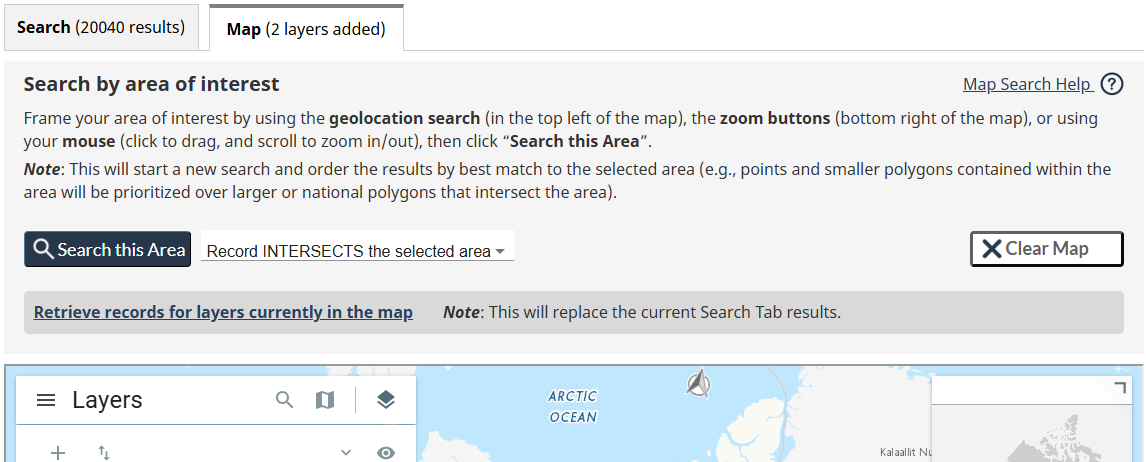
This will switch the view to the Search tab to initiate a new search, set the Geographic Location filter to the area you’ve zoomed to in the map, and set the sort order to Geographic Relevance so that the best geographic matches will appear close to the top of the Search Result Set.
Examining the search request details a bit closer, consider the following:
- Default search condition: The Geographic Location filter condition will be set to find records that INTERSECT with the selected area of interest. If desired, a different condition or adjustments can be made to the Geographic Location filter from the Keyword Search page.
- Geographic Relevance sort order: Generally, the records with smaller geometries (points and small polygons) closest to the center and within the search area score higher, larger polygons that are CONTAINED WITHIN the area score lower, followed by polygons that simply INTERSECT the search area (e.g., national scale dataset layer coverage).
- Records without Geographic Location excluded: With the INTERSECTS condition selected, OSDP records without a Geographic Location or identified as falling OUTSIDE the selected area will not be included in the Search Result Set.
Build a Map
Most records in OSDP contain Geographic Location details that can be used to visualize their location context in the map area. Further, these different views can be combined in the map to produce new, more comprehensive views that focus on one or many aspects of cumulative effects at the same time.
The map view you build is remembered within the browser session until the Clear Map button is clicked in the Search by area of interest block, or a new map view is initiated by a user-selected process (e.g., requesting to view one of the curated views from the Learn About Cumulative Effects or Learn About Development Activities pages). As such, it’s safe to navigate throughout the OSDP site knowing you can always return to your current map state.
There are many ways to augment the map with new visualizations, with the following being the most common:
- Add to Map: OSDP dataset records that reference supported external map service layers can be linked to the map by simply clicking on its related Add to Map button, located in the Search Result Set or on the record’s Metadata Page. Within Keyword Search, consider using the Location Mappable Type filter to constrain search results to just those records with Mappable Services to limit the options to the applicable records.
- Map Area: Any record in OSDP that contains a Geographic Location can have its coverage or context added to the map by clicking on the related record’s Map Area button, also located in the Search Result Set and on the record’s Metadata Page. Doing so will pin the point(s) or draw the polygon(s) on the map, zoom and center the map on the selected area, and add the related supporting contextual layer in the case of Monitoring Stations or Development Activities.
- Curated Learn About views: The detailed Learn About Cumulative Effects and Learn About Development Activities pages show and describe introductory views that assemble a few related layers together (e.g., Water quality, Economy and Industry, etc.), and then allow you to seed the Keyword Search and map views with the related content. These views can be a good starting point for the map and for discovering other related content. However, note that each of these requests will start a NEW search and map, replacing the old.
- Call to Action: Most curated collections offer a Call to Action, offering to load the map with a collection-related assembly of sample map layers. See the description of each for options to either augment the existing map or to replace it.
- Manual addition: For advanced users, the map viewer provides the ability to manually identify either a map service or map-ready file (e.g., SHP) to upload to the map viewer. Some knowledge of the type of service or content being loaded is required, as it needs to be specified to complete the process.
Export your Work
At any time during map production, the visuals and list of OSDP records used in producing the map can be captured and stored outside OSDP. Following any of these extraction processes, you can continue to build and augment your current map.
Capturing Visuals: Within the map viewer, you can request that the current map view be exported to a JPG graphics file, which includes the current zoomed view of the map along with the map scale and legend. This feature can be accessed from the map viewer’s App Bar along the left side of the map, by clicking the Export button. Follow the instructions, which will conclude in the prepared graphic file being downloaded within the browser.
Retrieve Mapped records: When working within the map viewer with loaded layers, coverage, and context from many different external sources, it can be unclear what OSDP records were used since each organization has its own naming conventions. However, OSDP helps eliminate this challenge by providing a 1-click function to itemize all the OSDP records that were used in the production of the map, by clicking on the Retrieve records for layers currently in the map link above the map.
Doing so switches the view to the Search tab where a new Retrieve Mapped Records search is initiated, itemizing all the OSDP records used in an Add to Map or Map Area capacity, along with any collections that contain those records. These records are available to explore directly in the Search Result Set just like any other search results, while also providing access to two important functions that allow you to save the OSDP record details externally via the Search Result Set Tools.
- Share Link Tool: Clicking this button copies a link to the clipboard that can reproduce this Retrieved Mapped Records result set at any time. As such, it supports the ability to save your work offline and either share with others or reproduce the starting point in OSDP on your return. From there, the layers can quickly be re-added to the map viewer in a new browser session from the Search Result Set.
- Export Tool: Clicking this button will export all records on the current tab to a comma-delimited file (CSV) containing the core metadata details of each of the OSDP records used in preparation of the map. The file also includes links to each record’s Metadata Page where the full metadata can be found, along with an APA version 7 citation reference for each record in support of citing the content used in the map.
Get Viewer Help
Guidance on how to use the map viewer and its tools can be accessed from two places within the viewer itself. The first is by clicking the question icon in the map tools, located in the bottom right of the map viewing area.

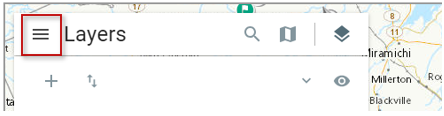
The second way to access the map viewer help is from within the viewer’s main menu. Click on the 3 parallel bars in the top left corner of the viewer, and then select the Help option from the pop-out window that appears.