
Saved Search
Keyword Search provides quick access to the most common features to search and Filter the OSDP records, along with the convenience of being able to save and recall your Saved Search Requests on the same page. Your library of Saved Search Requests can further be managed and augmented with additional features, accessed via the Manage button in the Saved Search portion of the Search page. Here you can:
- Modify, Copy, or Delete existing queries in your library
- Create new queries
- Configure your preferences to use your search requests across multiple devices and back them up to the cloud
- Access all available OSDP Metadata Fields in your queries
- Build multi-part queries with enhanced conditions
Click on the tabs below to learn more about Saved Search.
Request Search
While preparing a search request, at any time you can choose to save that combination of keywords and filters as a Saved Search Request, which will add it to your library. Once in your library, you can recall that Saved Search Request and blend it with other search criteria, without ever needing to leave the Keyword Search page.
Search Tip
Creating a Saved Search Request when you have a common set of criteria you use in many queries is a great way to start with a specific baseline that you vary slightly in many searches with the core Filters.
1. Access Saved Search Requests
To include the search criteria specified within an existing Saved Search Request, simply select it from the drop-down menu in the Saved Search block of the Keyword Search page. After selection, the additional search criteria related to that Saved Search Request will be added to the Active Filters block, and the Search Result Set will be refreshed.

2. De-selecting a Saved Search Request
To cease including a Saved Search Request in the current search criteria, remove it by clicking the Clear button next to the Saved Search drop-down menu, or click the X next to the Saved Search filter in the Active Filters block.

3. Create a New Saved Search Request
Clicking the Save New button in the Saved Search block will prompt you to create a new Saved Search Request that combines all the search criteria currently specified in the Active Filters block, including keyword searches, filters, and/or another Saved Search Request. It will present the criteria for you to review, and it will be added to your library after you provide a new unique name and click Apply.

Manage Saved Search Requests
From within the Keyword Search page, click on the Manage button to access your library of Saved Search Requests.

On the page that’s presented, follow the instructions to create new requests using the Add button, or to Modify, Copy, or Delete existing Saved Search Requests using the icons next to each saved query. Double-clicking on a Saved Search Request in the list is also a quick way to initiate a Modify request on it.
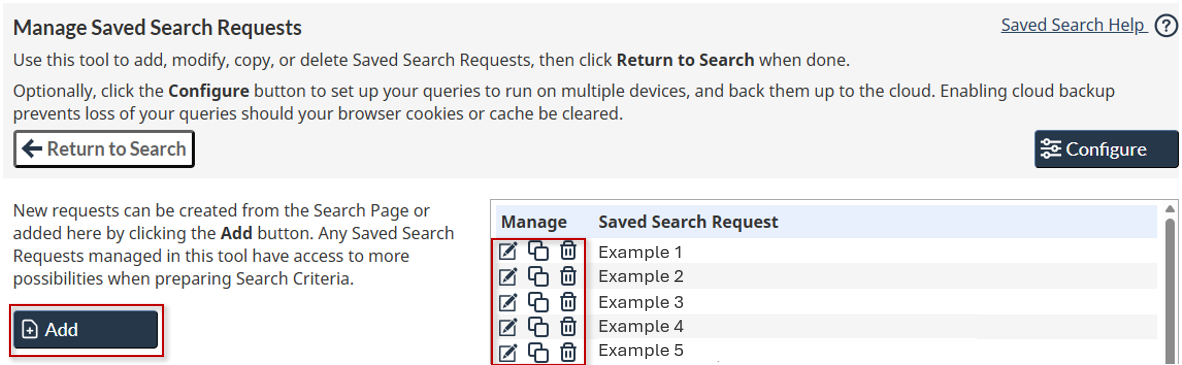
You can return to the Search page at any time by clicking the Return to Search button.
Configure Options
On the Manage Saved Search Requests page, click the Configure button to set up your queries to run on multiple devices, and back them up to the cloud.

In the Saved Search Configuration page that’s presented, you can control how your Saved Search Requests are managed.
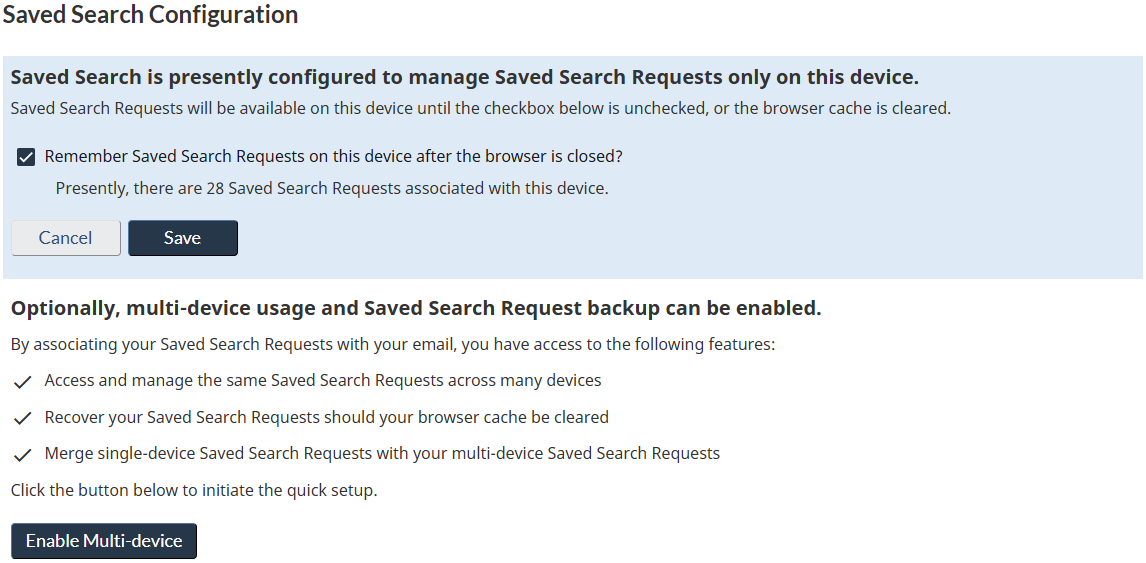
Saving Queries Locally
By default, the Saved Search Requests you create and save within your current browser session are stored to your local device so that they are available to you the next time you return to OSDP.
If you’d prefer that your Saved Search Requests not be available on this device the next time OSDP is visited (e.g., you’re using a public computer), deselect the checkbox starting with Remember search requests…, and click the Save button. Alternatively, the Cancel button can be pressed to return to the Manage Saved Search Requests page without taking any action.
Option selections are committed after the browser session is closed, leaving you the opportunity to reassess your selections while the browser tab remains open. Once deleted, the saved search requests cannot be recovered.
Caution
Note that should your browser cache be cleared, you may lose your Saved Search Requests. Consider enabling multi-device support and cloud backup if you’d prefer to remove this as a risk.
Enabling Multi-Device Support and Cloud Backup
Click the Enable Multi-device button at the bottom of the dialog to initiate the quick setup to enable cloud backups and the ability to use the same Saved Search Requests on multiple devices.
The process is simple:
- You provide an email address you wish to use for recovery.
- A code is sent to the provided email address that you paste into the dialog.
- You have the option of merging the local device’s saved requests with your existing Saved Search Requests.
- You’re set up!
Repeat this process on any additional devices you would like to associate.
Privacy Note
Your email is only captured by the local process on your device for the purpose of establishing its existence and is not stored on OSDP Servers.
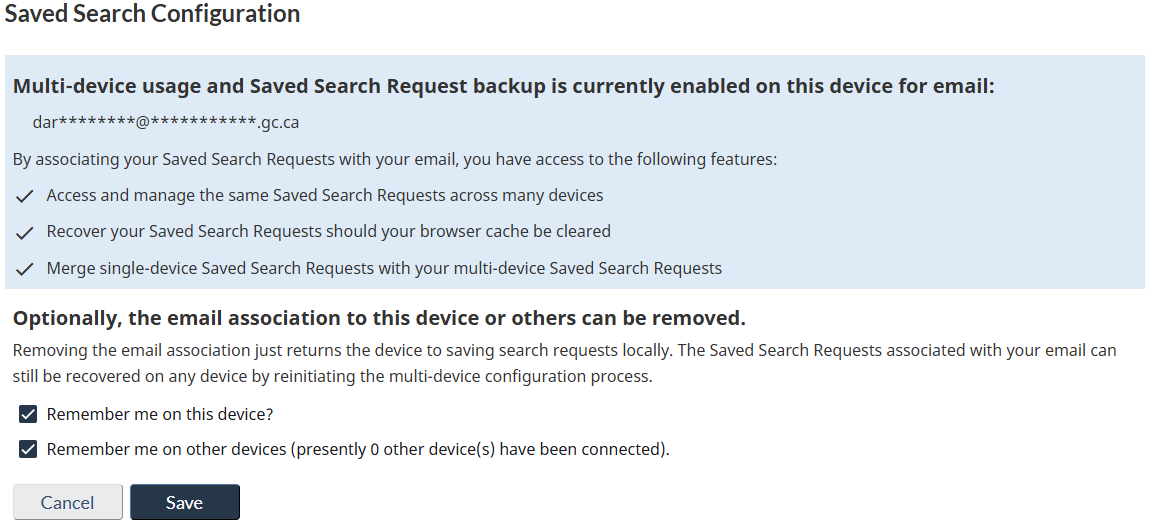
Removing Multi-Device Support
At any time, you can remotely remove sharing across devices by opening the Configuration dialog from an associated device. When a device is enabled for multi-device support, different options are now available to stop remembering your saved searches on the current device and/or all other devices.
Option selections are committed after the browser session is closed, leaving you the opportunity to reassess your selections while the browser tab remains open. Once deleted, the saved search requests cannot be recovered.
Build Search Request
Most Search Requests can be built, saved, and recalled directly on the Keyword Search page, as described on the Request Search tab of this page. However, when there’s a need to modify an existing Saved Search Request or take advantage of additional metadata or enhanced search conditions, the Manage Search Request dialog is available.
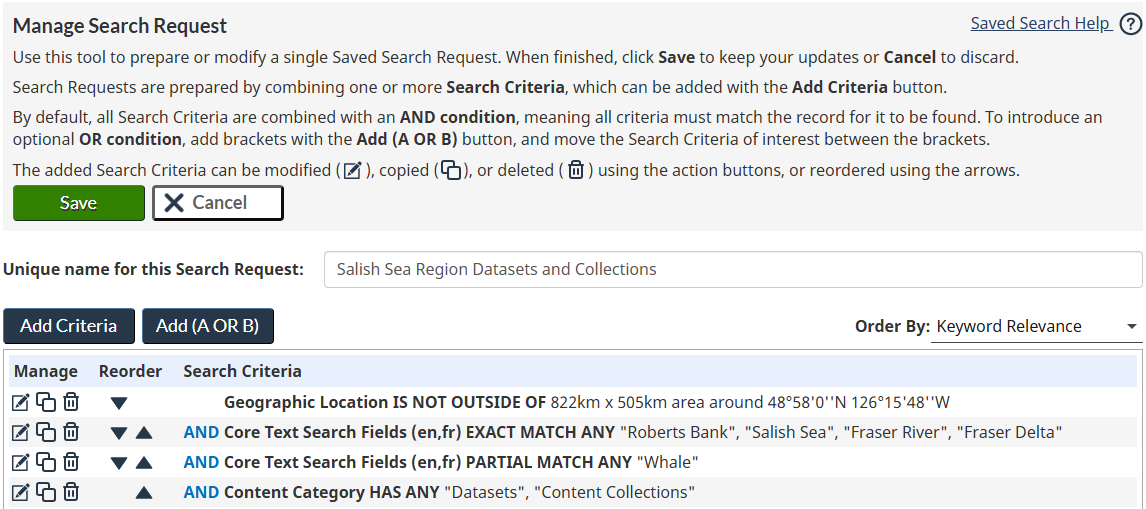
It’s accessed from the Manage Saved Search Requests page, by creating a new search request, or modifying/copying an existing one. Using this dialog to create or update a Search Request is as simple as the following steps:
- Add, update, and rearrange as many Search Criteria as you’d like, using the described tools.
- Give the Search Request a unique name.
- Set the preferred Sort Order that the resulting Search Result Set should use.
- Click the Save button to apply your updates and return to the Manage Saved Search Requests page.
Manage Search Criteria
On the Keyword Search page you can add Filters to refine the results seen in the Search Result Set. Adding a Search Criteria to your Saved Search Request has the same effect, in that both organize one or more fields, a search condition, and one or more values for comparison.
The difference is that through this process you have full access to all OSDP metadata fields, more search conditions, and greater flexibility to assemble a search request to your specifications.
Search Criteria creation is presented as a pop-up click-through process to identify the field(s) you’d like considered in your search criteria, set the condition, choose the values, and confirm the result. On save, the Search Criteria is added to the Search Request you are currently modifying, after which it can further be reordered within the other Search Criteria as appropriate.
As described in the Field Glossary, OSDP has many different types of fields that require different types of values (e.g., text, codes, dates, map area, etc.). The click-through process simplifies this by presenting the right types of condition and value tools after the field is selected.
Most Search Criteria compare one OSDP metadata field to the value(s) you provide, while text-based fields are an exception in that they support many fields. When a text field is selected for comparison in a Search Criteria, after clicking the Next button you’ll be given an opportunity to include any combination of text fields in the comparison, or to separate them by official language where applicable.